


New Year New Closet ... My Master Closet Makeover
This post is part of a social shopper marketing insight campaign with Pollinate Media Group® and Newell Rubbermaid, but all my opinions are my own. #pmedia #HomeFreeLowes http://my-disclosur.es/OBsstV


Since we have a lil' one on the way (here is our baby announcement in case you missed it), one of our New Years Resolutions is to get the house organized + ready for TBD. One area that was a complete mess was our master closet. It's not huge, so it's difficult to fit everything without total chaos. I thought about hiring a custom closet company to come in and do everything, but I quickly realized that can get very expensive. Instead, I decided to try out one of those closet organization systems you can get at a home improvement store. I decided to get the Rubbermaid HomeFree Closet System. I found it at Lowe's. I am obsessed! It worked awesome. Here is what I did and some tips I learned along the way, so you don't make the same mistakes I did. Hope this gives you some good closet organization ideas for the New Year! P.S. If you are looking for some more organization ideas, check out my DIY acrylic calendar which includes a free printable 2015 calendar.
Before

Here is the before. As you can see - a total mess factor. One of my major goals of reorganizing was to be able to get rid of that black chest of drawers you see peeking out of the right side of the photo. It took up so much room in the bedroom and created a very narrow passageway between the bed and the dresser to the rest of the bedroom and the bathroom. Mission accomplished.
After

Here is the after! I was able to get rid of the chest of drawers in the bedroom, and everything has it's own perfect little spot now. What do you think? I'll go into detail about what I did below.
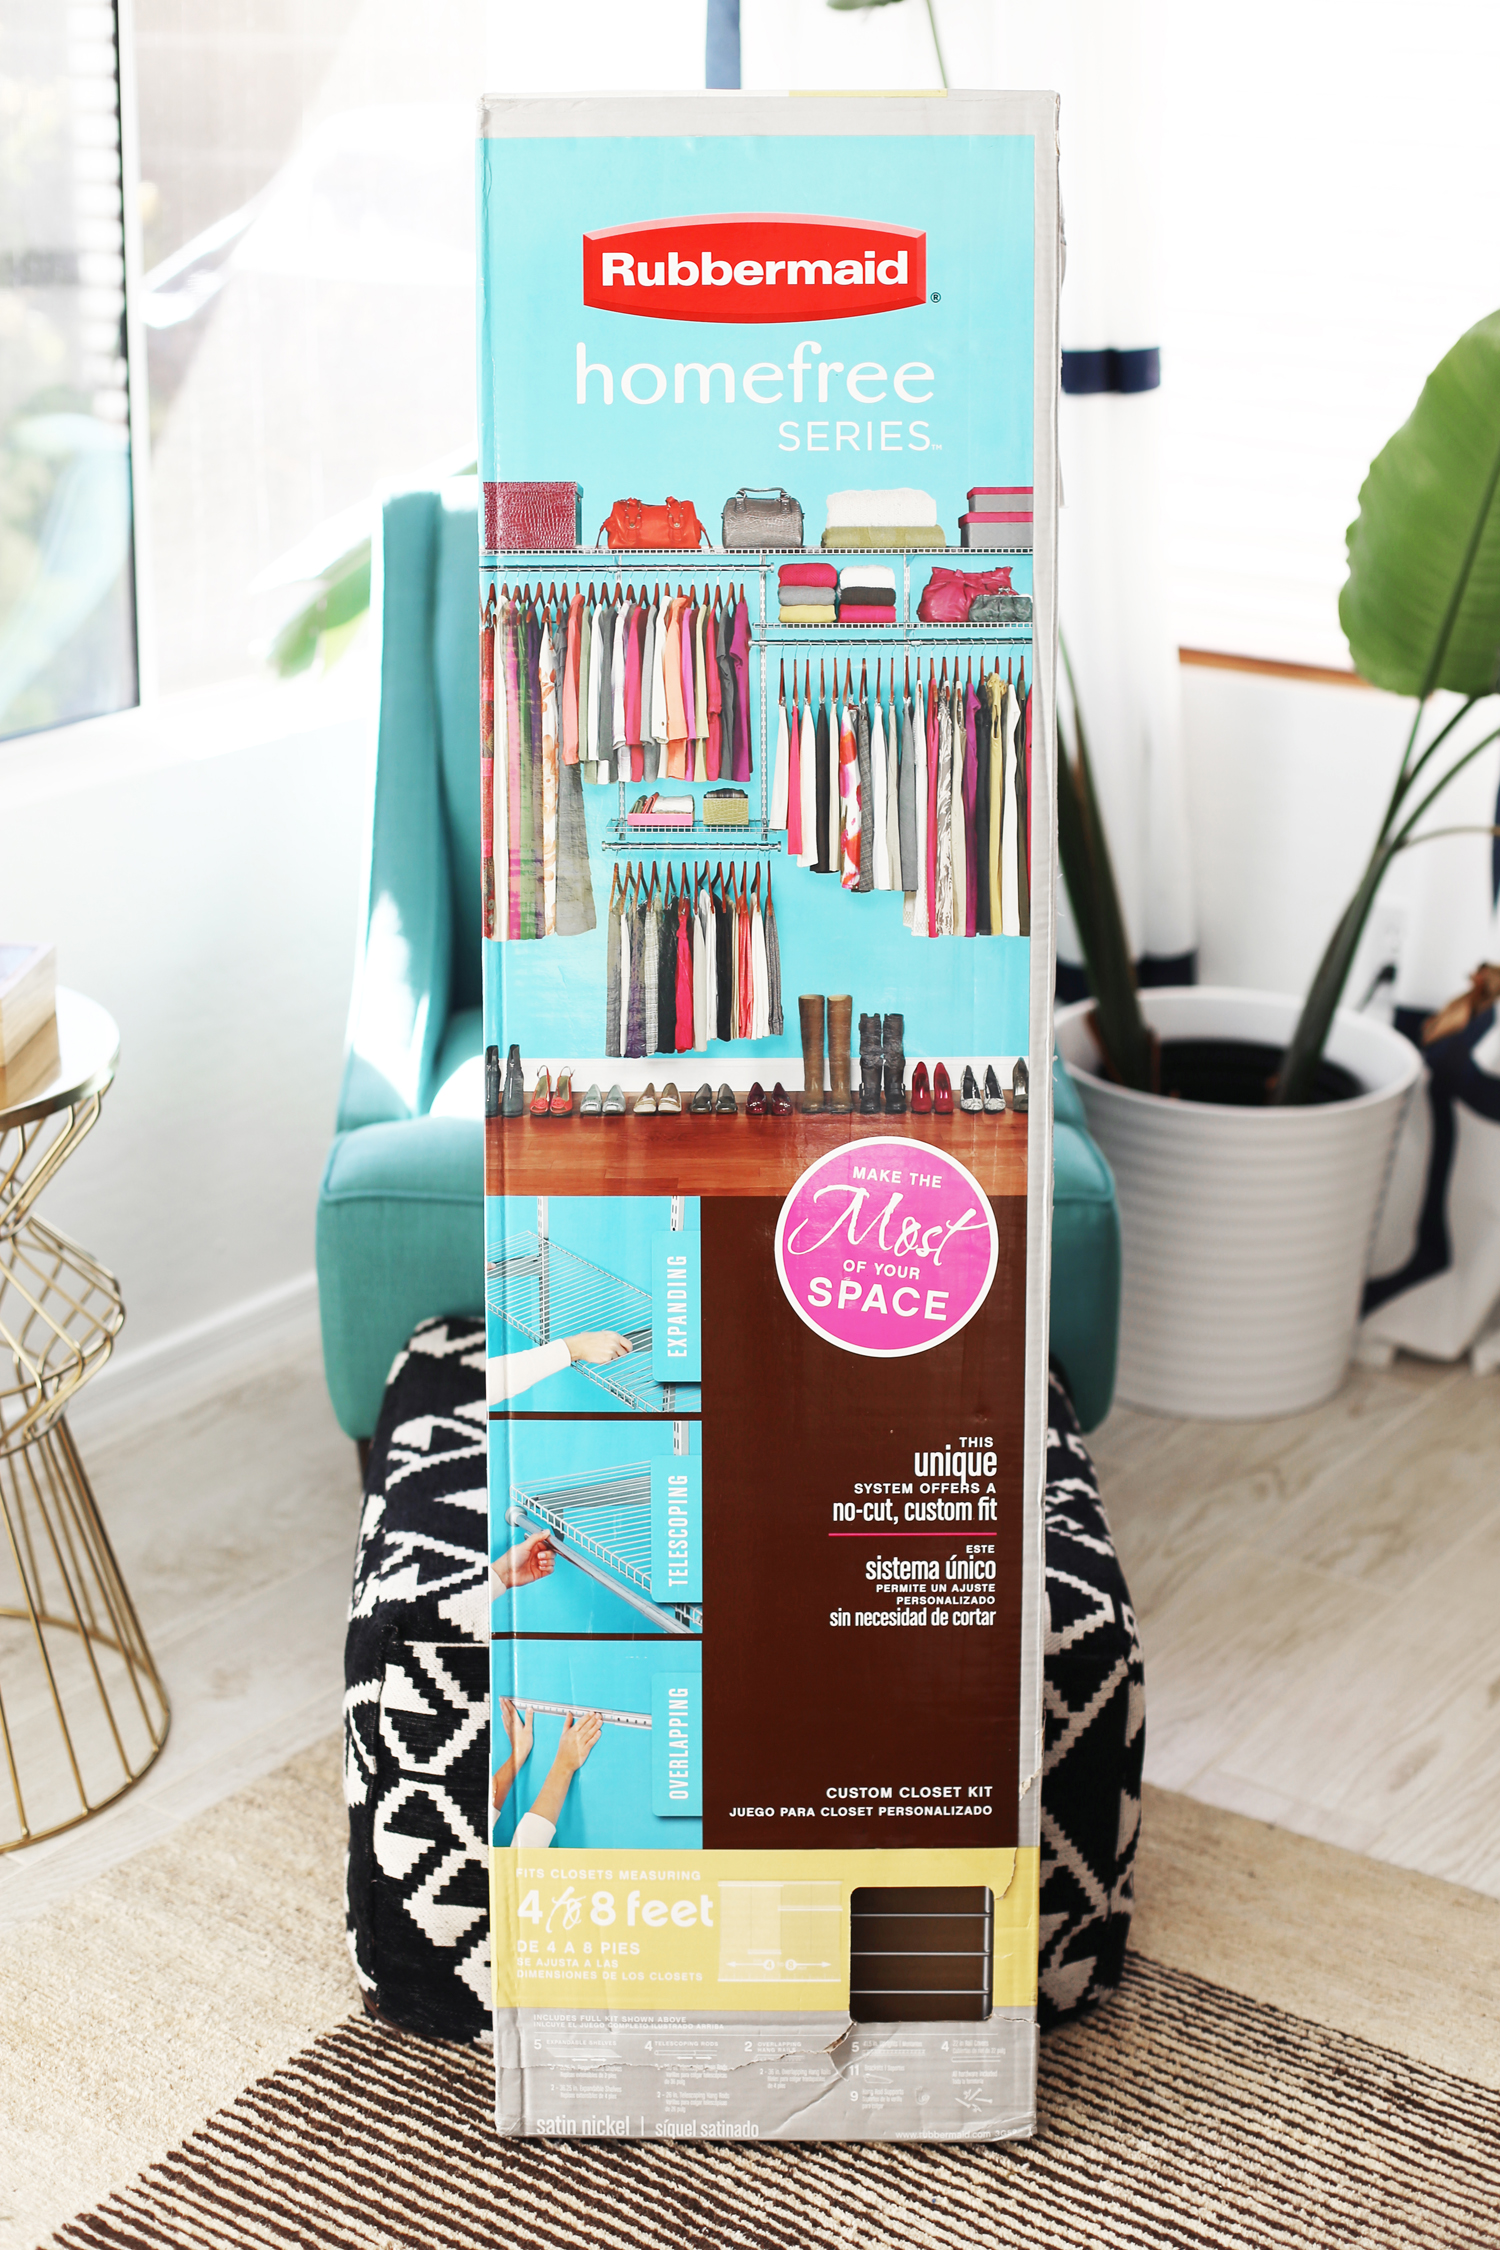

Rubbermaid HomeFree Closet System 8-ft Adjustable Mount Wire Shelving Kit in Satin Nickel
Rubbermaid HomeFree Closet Systems Satin Nickel Wire Sliding Basket
Rubbermaid HomeFree Closet Systems Espresso Wood 2 Drawer Unit
Rubbermaid HomeFree Closet Systems Espresso Shelf
Rubbermaid HomeFree Closet Systems Satin Nickel Wire Sliding Tie and Belt Racks
1.5" wood chisel
hammer
sand paper
drywall mud
paint the color of your closet wall
stud finder
utility knife

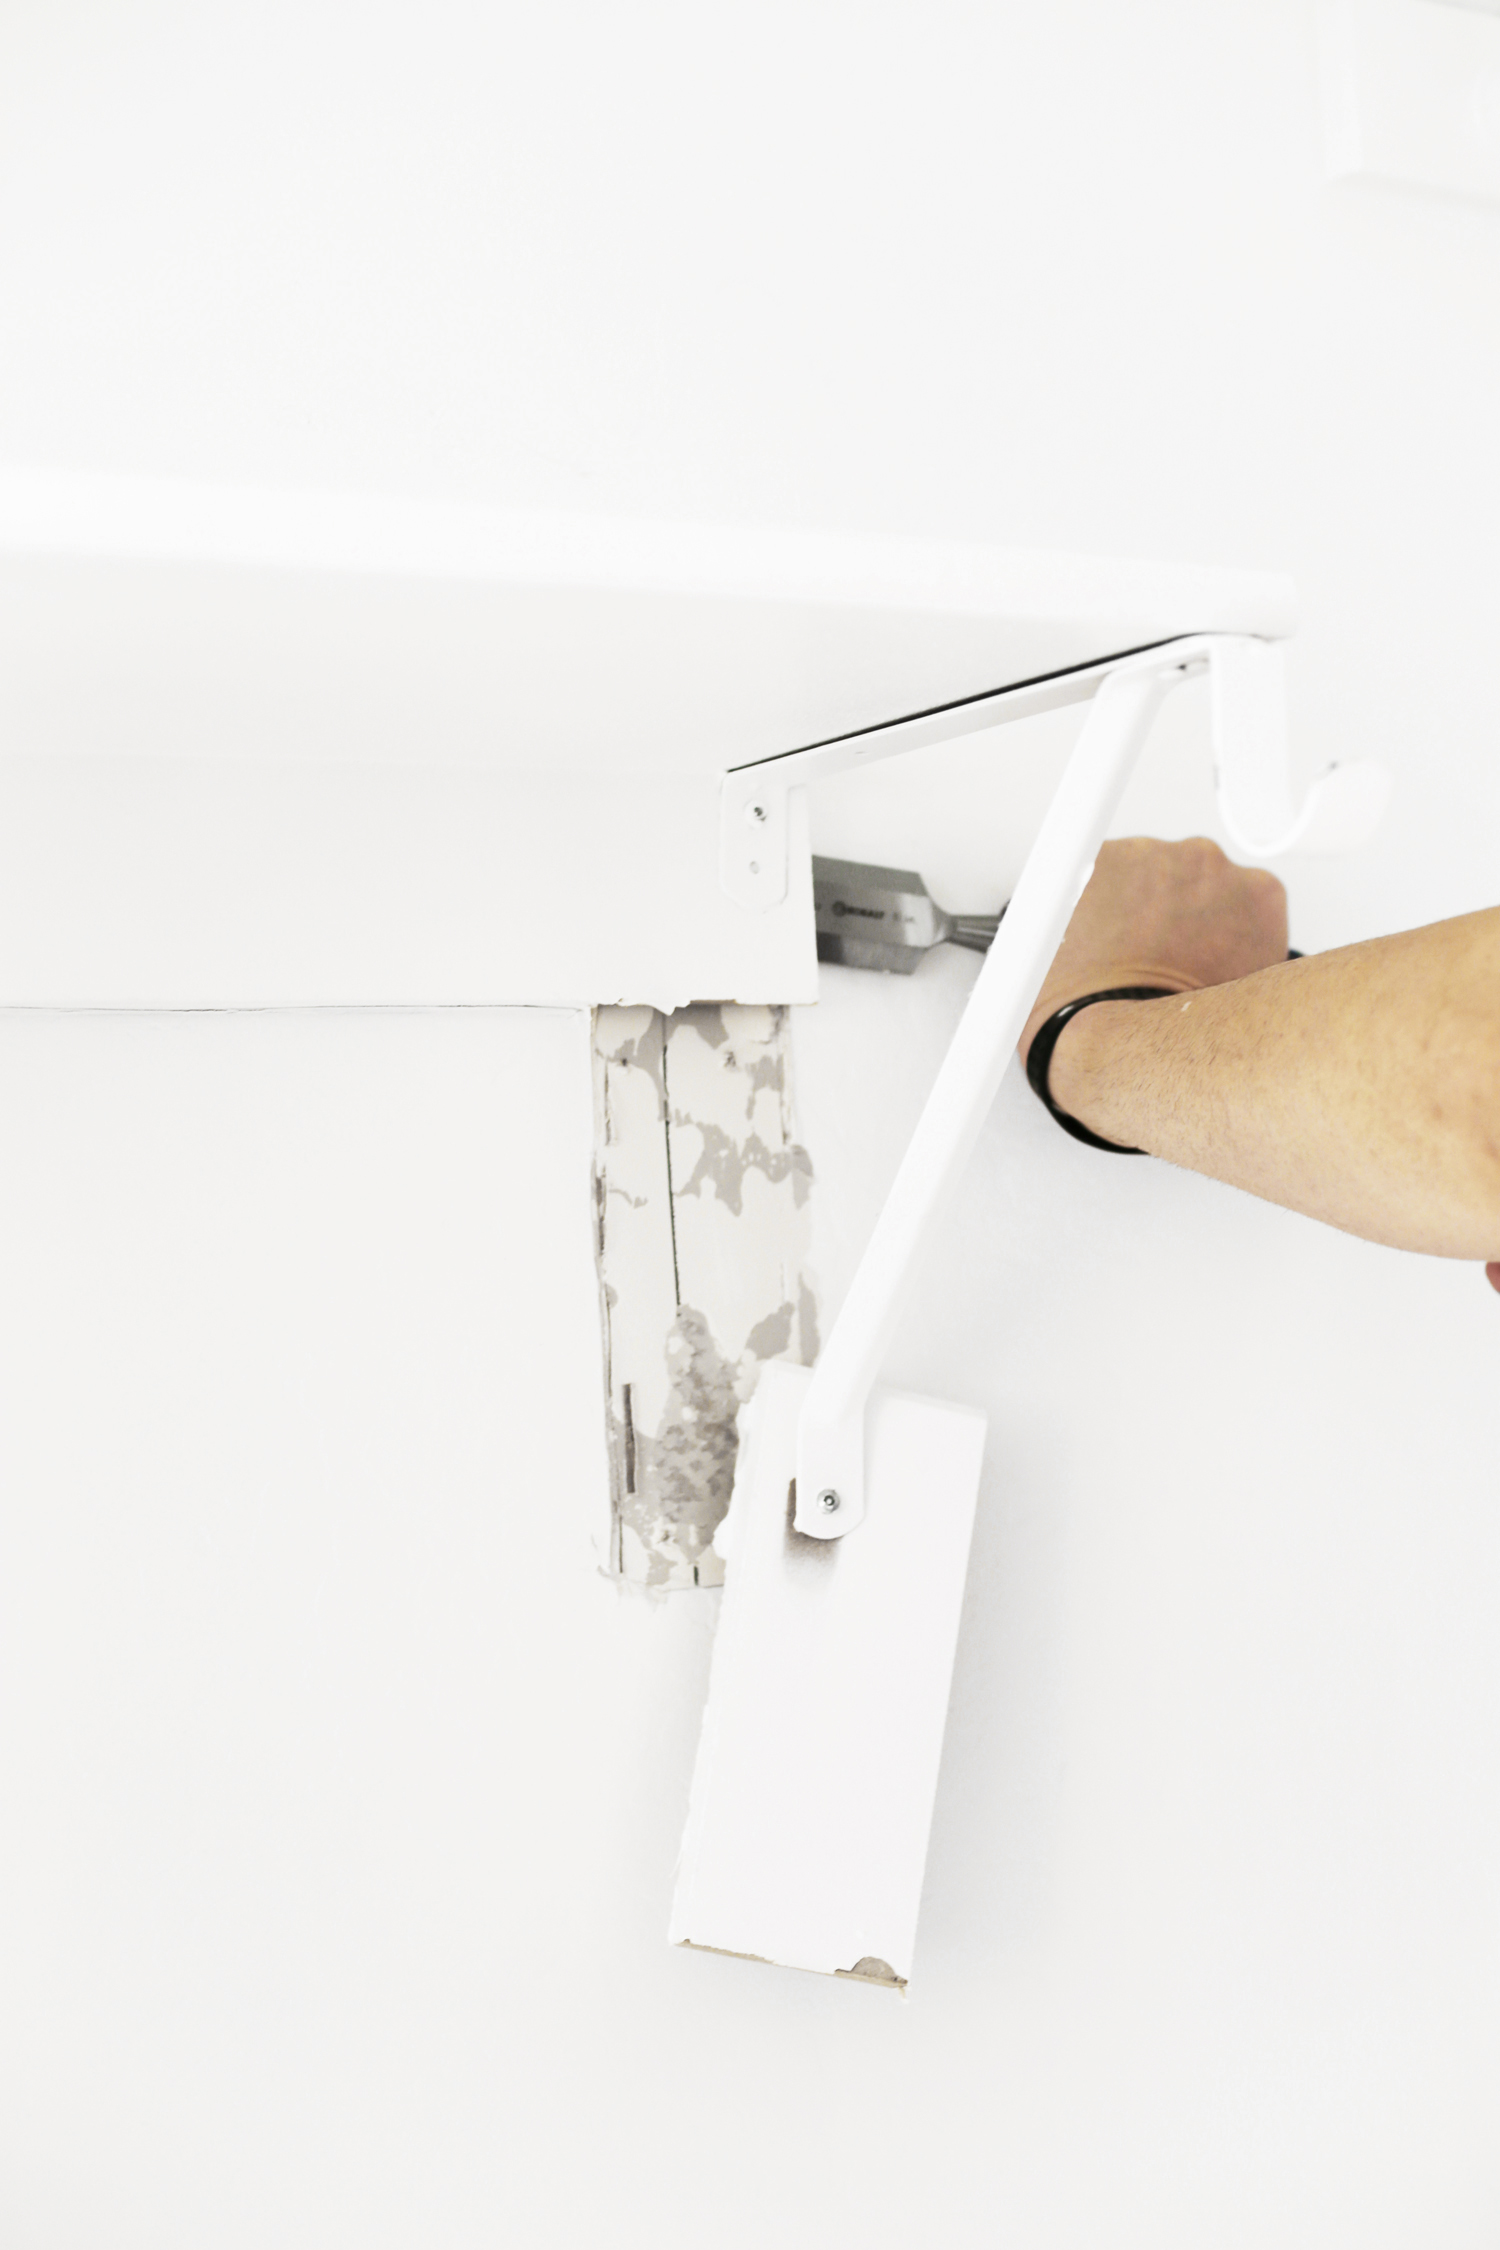
First, I removed my old closet brackets. To do this, I unscrewed the screws. Then I used a utility knife and cut around the edges of the wood supports. This helped me remove the wood supports without tearing too much off the wall. I used a 1.5" wood chisel and a hammer to remove the wood supports attached to the wall. Next, I used drywall mud/nail filler + spackling to hide the defects in the wall. I then sanded down the wall where the brackets were to smooth out the rough edges. Next, I painted the wall.

I then hung the Rubbermaid HomeFree Closet System. For my closet, I used the 8-ft Adjustable Mount Shelving Kit in Satin Nickel. My closet is just over 6 feet wide, so I could have gone with the 6-ft kit, but I liked having some extra options to play with. I will be doing the sides of my closet as well, so that will be useful when I do them.
To get started with hanging the kit, I first marked where the studs were on the wall using a stud finder. I hung the top hang rails across the full length of my back wall, overlapping the rails in the center. I drilled holes where the studs were and screwed the rails in using the mounting screws. Note: One thing I wished I would have done differently is as follows. I am going to do the sides of my closet, so I bought an extra hang rail for the left side. However, the extra hang rails as far as I know only come in a 4-ft length. The problem is the left side of my closet is not 4-ft wide. It's just under 4-ft. The rails that come in the kit are 3-ft in length, which would have fit on the left side. So, I wished I would have used the 4-ft hang rail on the back wall and the 3-ft hang rail on the side. I'm going to see if I can get the 4-ft rail cut somewhere so I don't have to remove anything from the back wall. However, if you can avoid this it's much easier! Hope this helps you not make the same mistake I did!
So back to the instructions ... I wanted to center my closet system on the back wall. To do this, I first marked the very center of the width of the wall. Since the uprights are to be placed 22" apart if you are using the accessories, I marked 11" to the right and left of the center point. I mounted the first two uprights here according to the instructions, and then I mounted two more uprights 22" to the right and to the left for a total of four uprights.
On the left side, I used the short clothing rod.
On the right side, I used another short clothing rod.

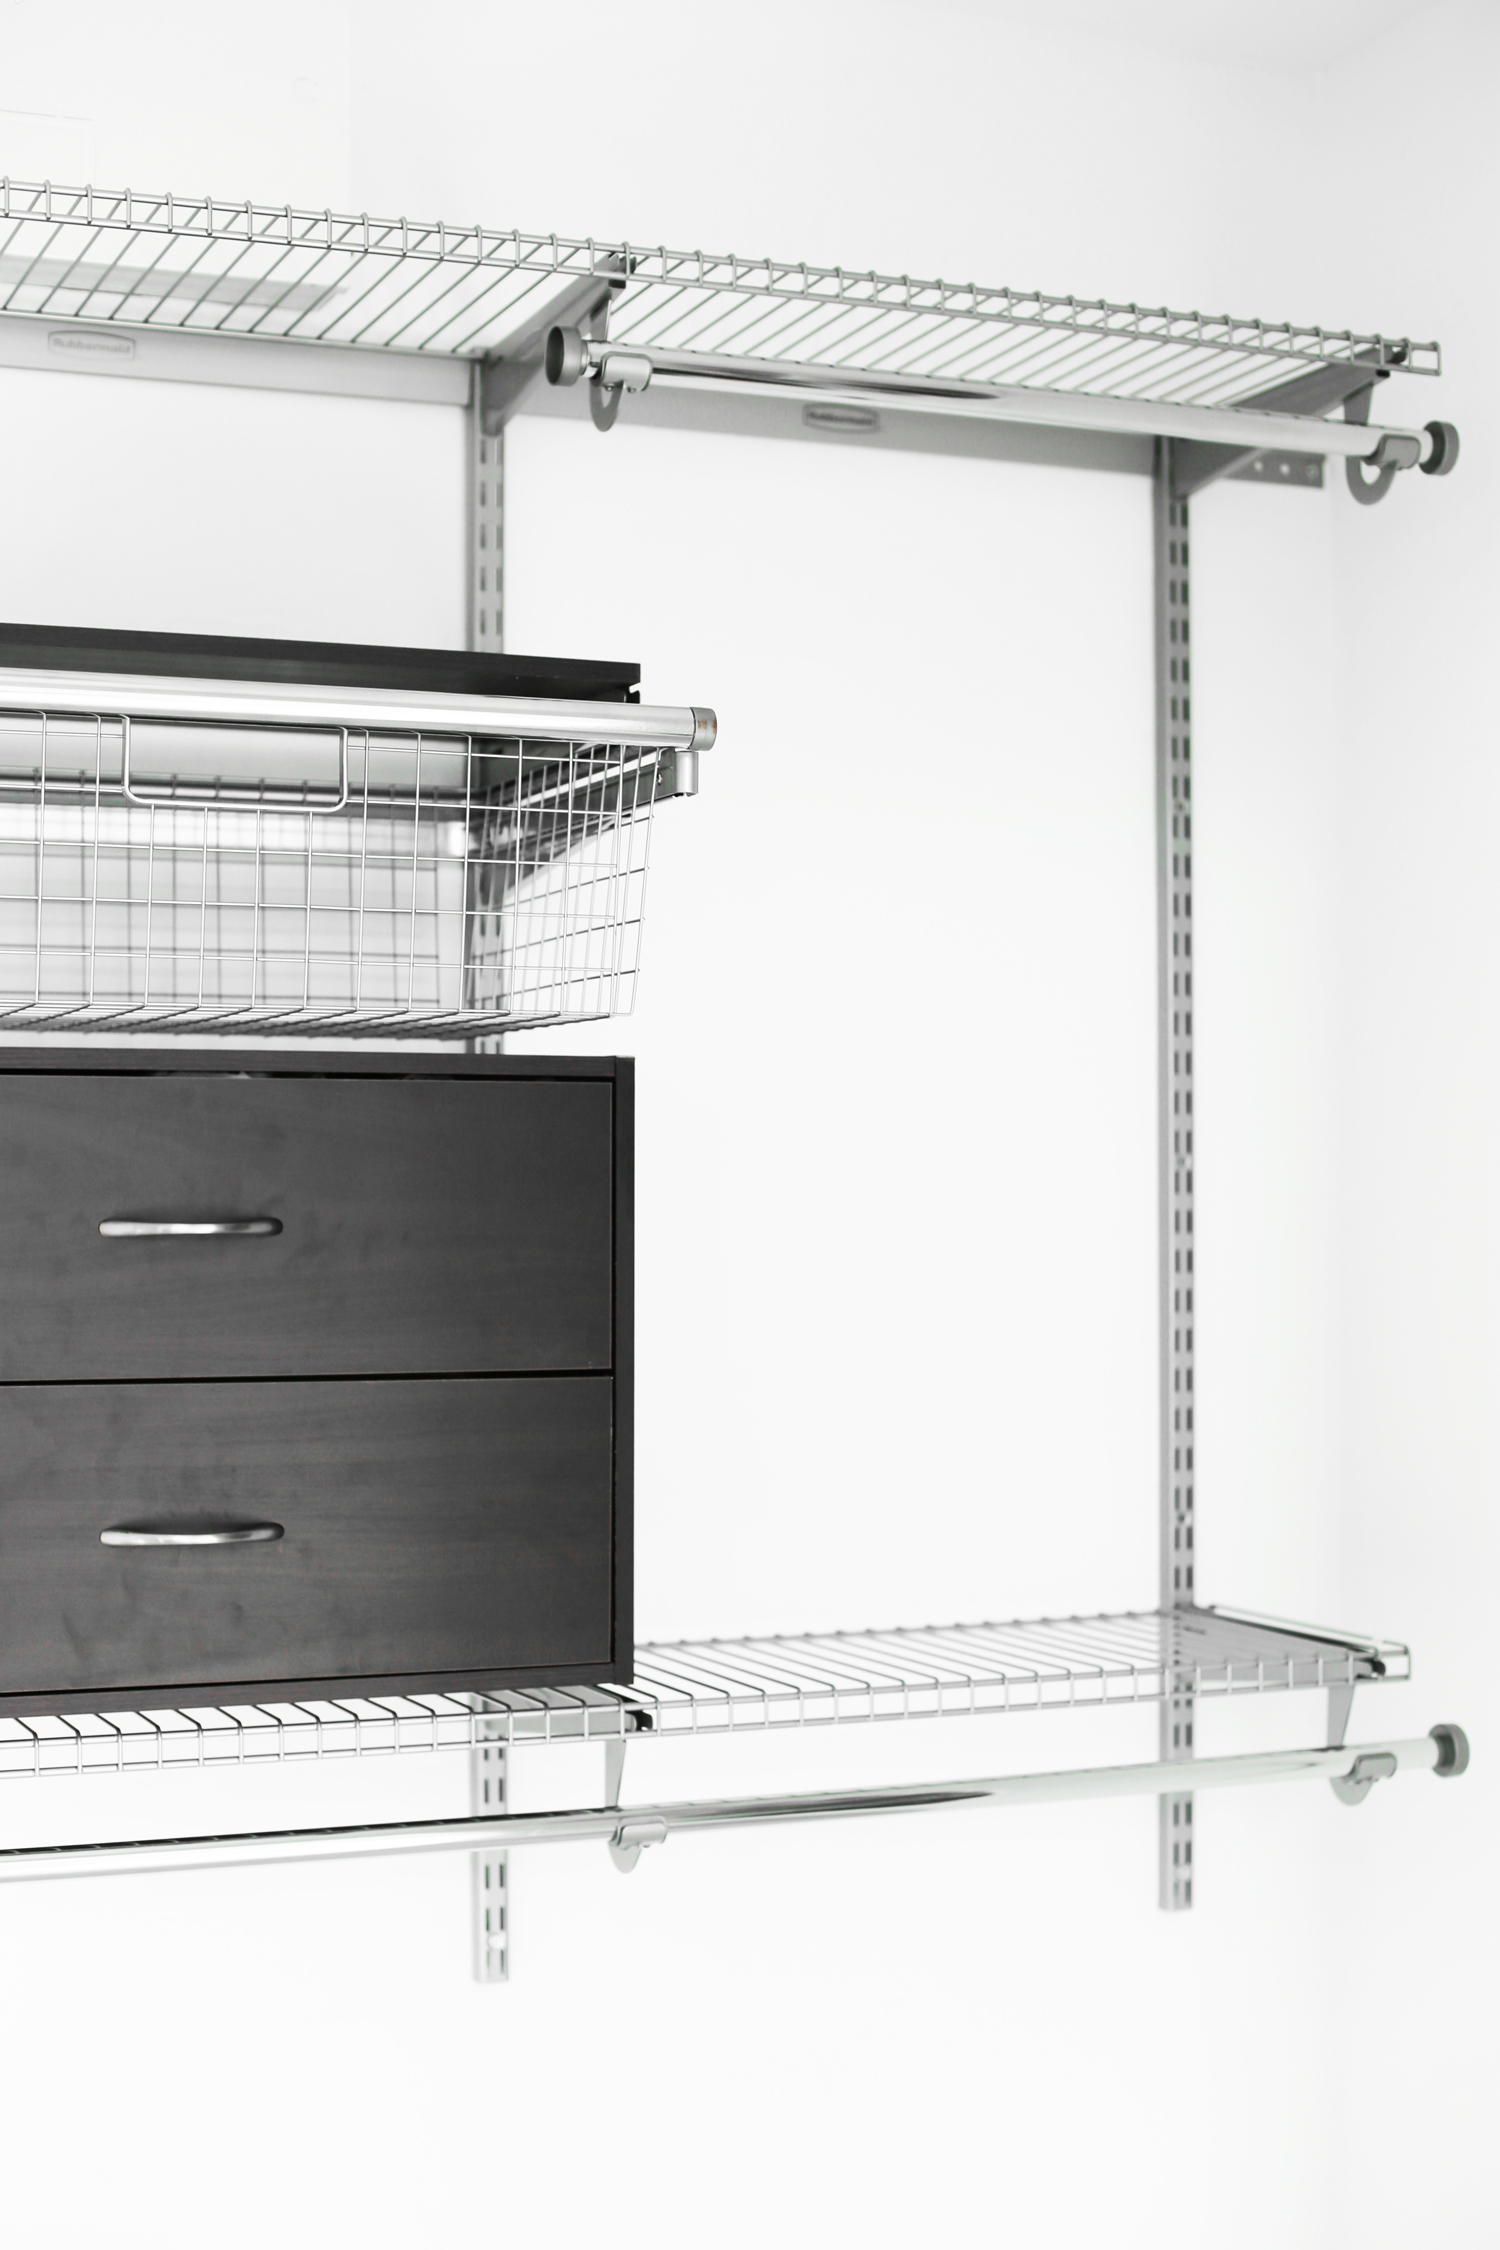
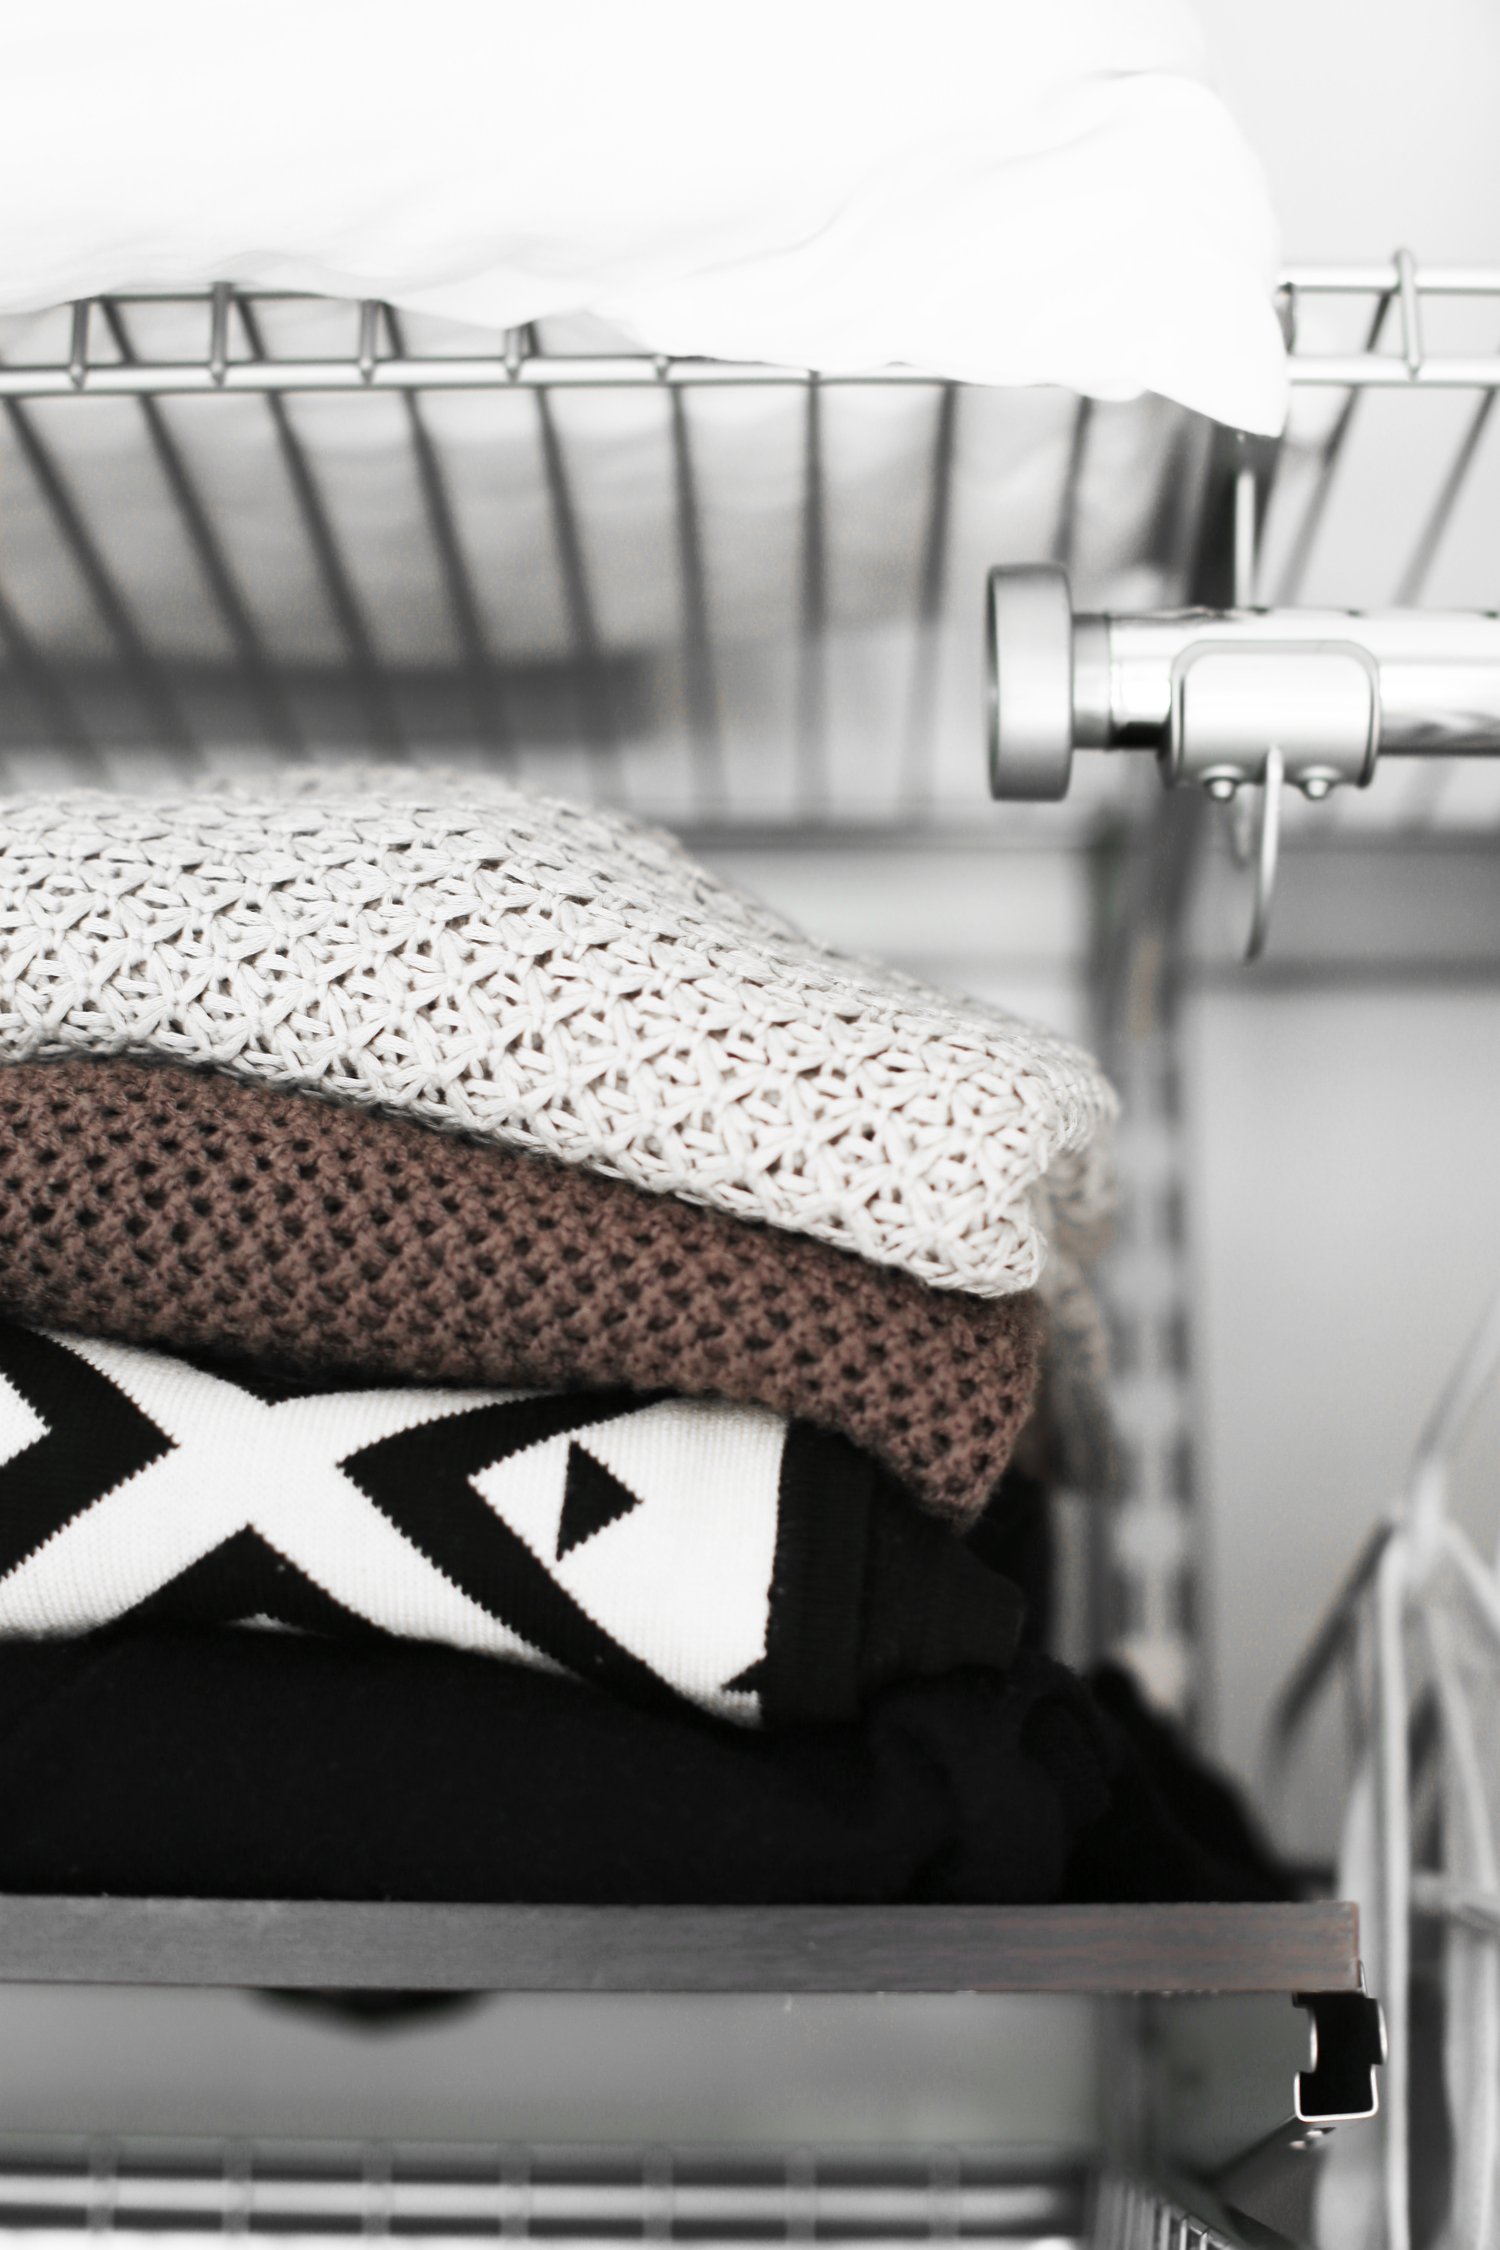
I topped the system with the adjustable wire shelves. And on the bottom right side, I used the 4-ft clothes rod and topped it with the 4-ft wire shelf. In the center, I stacked the espresso shelf, wire basket, and drawer unit. Note: I am showing you the entire system hung up here just so you can get an idea of what I did. I don't recommend hanging your entire system and accessories at once! Instead, my advice is to try each hang rod and each accessory before you move onto hanging the next piece. For example, hang each piece of clothing on the rod you are planning to hang them on. You will find you didn't estimate correctly for each piece and some shirts will be dragging on the floor. You can move up your rod or accessory accordingly.

Love the clothes rods.
The espresso shelf is the easiest thing to install, which I was surprised by.

The wire basket ...

and the tie + belt racks are my absolute favorite!
So to recap, I used the:
Total cost: $280.93 + tax
I'm happy spending this instead of the thousands I would have spent on a custom closet company. Plus the good thing about this is you can adjust it as your clothing needs change. I'll keep you updated when I do the sides of the closet! My dream is to get wooden hangers someday, so hopefully that will be included! However, I priced them out at Costco, and it will be $700. Any idea where I can get them cheaper?
If you find this post helpful, I would love it if you subscribe below! Subscribers get an exclusive DIY every week and a free party printable collection just for signing up!


