


DIY This Barn Door with Stikwood


SUPPLIES
1/2" thick piece of plywood
Minimalist Fir stikwood (consult with them to see how much you need)
Minimalist Fir stikwood corner trim (ask Stikwood for this finish)
stikwood black metal trim (only needed if you are finishing backside)
measuring tape
miter saw (at least 10")
barn door hardware kit
barn door roller guide
IKEA BAGGANÄS handle
IKEA BAGGANÄS knobs
uxcell M4 x 50mm fully threaded rod fasteners (if you are finishing the backside)

INSTRUCTIONS
Cut the plywood to the length and height that you want the door to be. Home Depot does custom pieces of plywood at the custom orders desk. We ordered a 11' x 4' piece. When sizing your door, keep in mind that the stikwood corner trim will add 3/16" of an inch around the entire perimeter. Next step - mark the lengthwise center of the plywood, and draw a line.

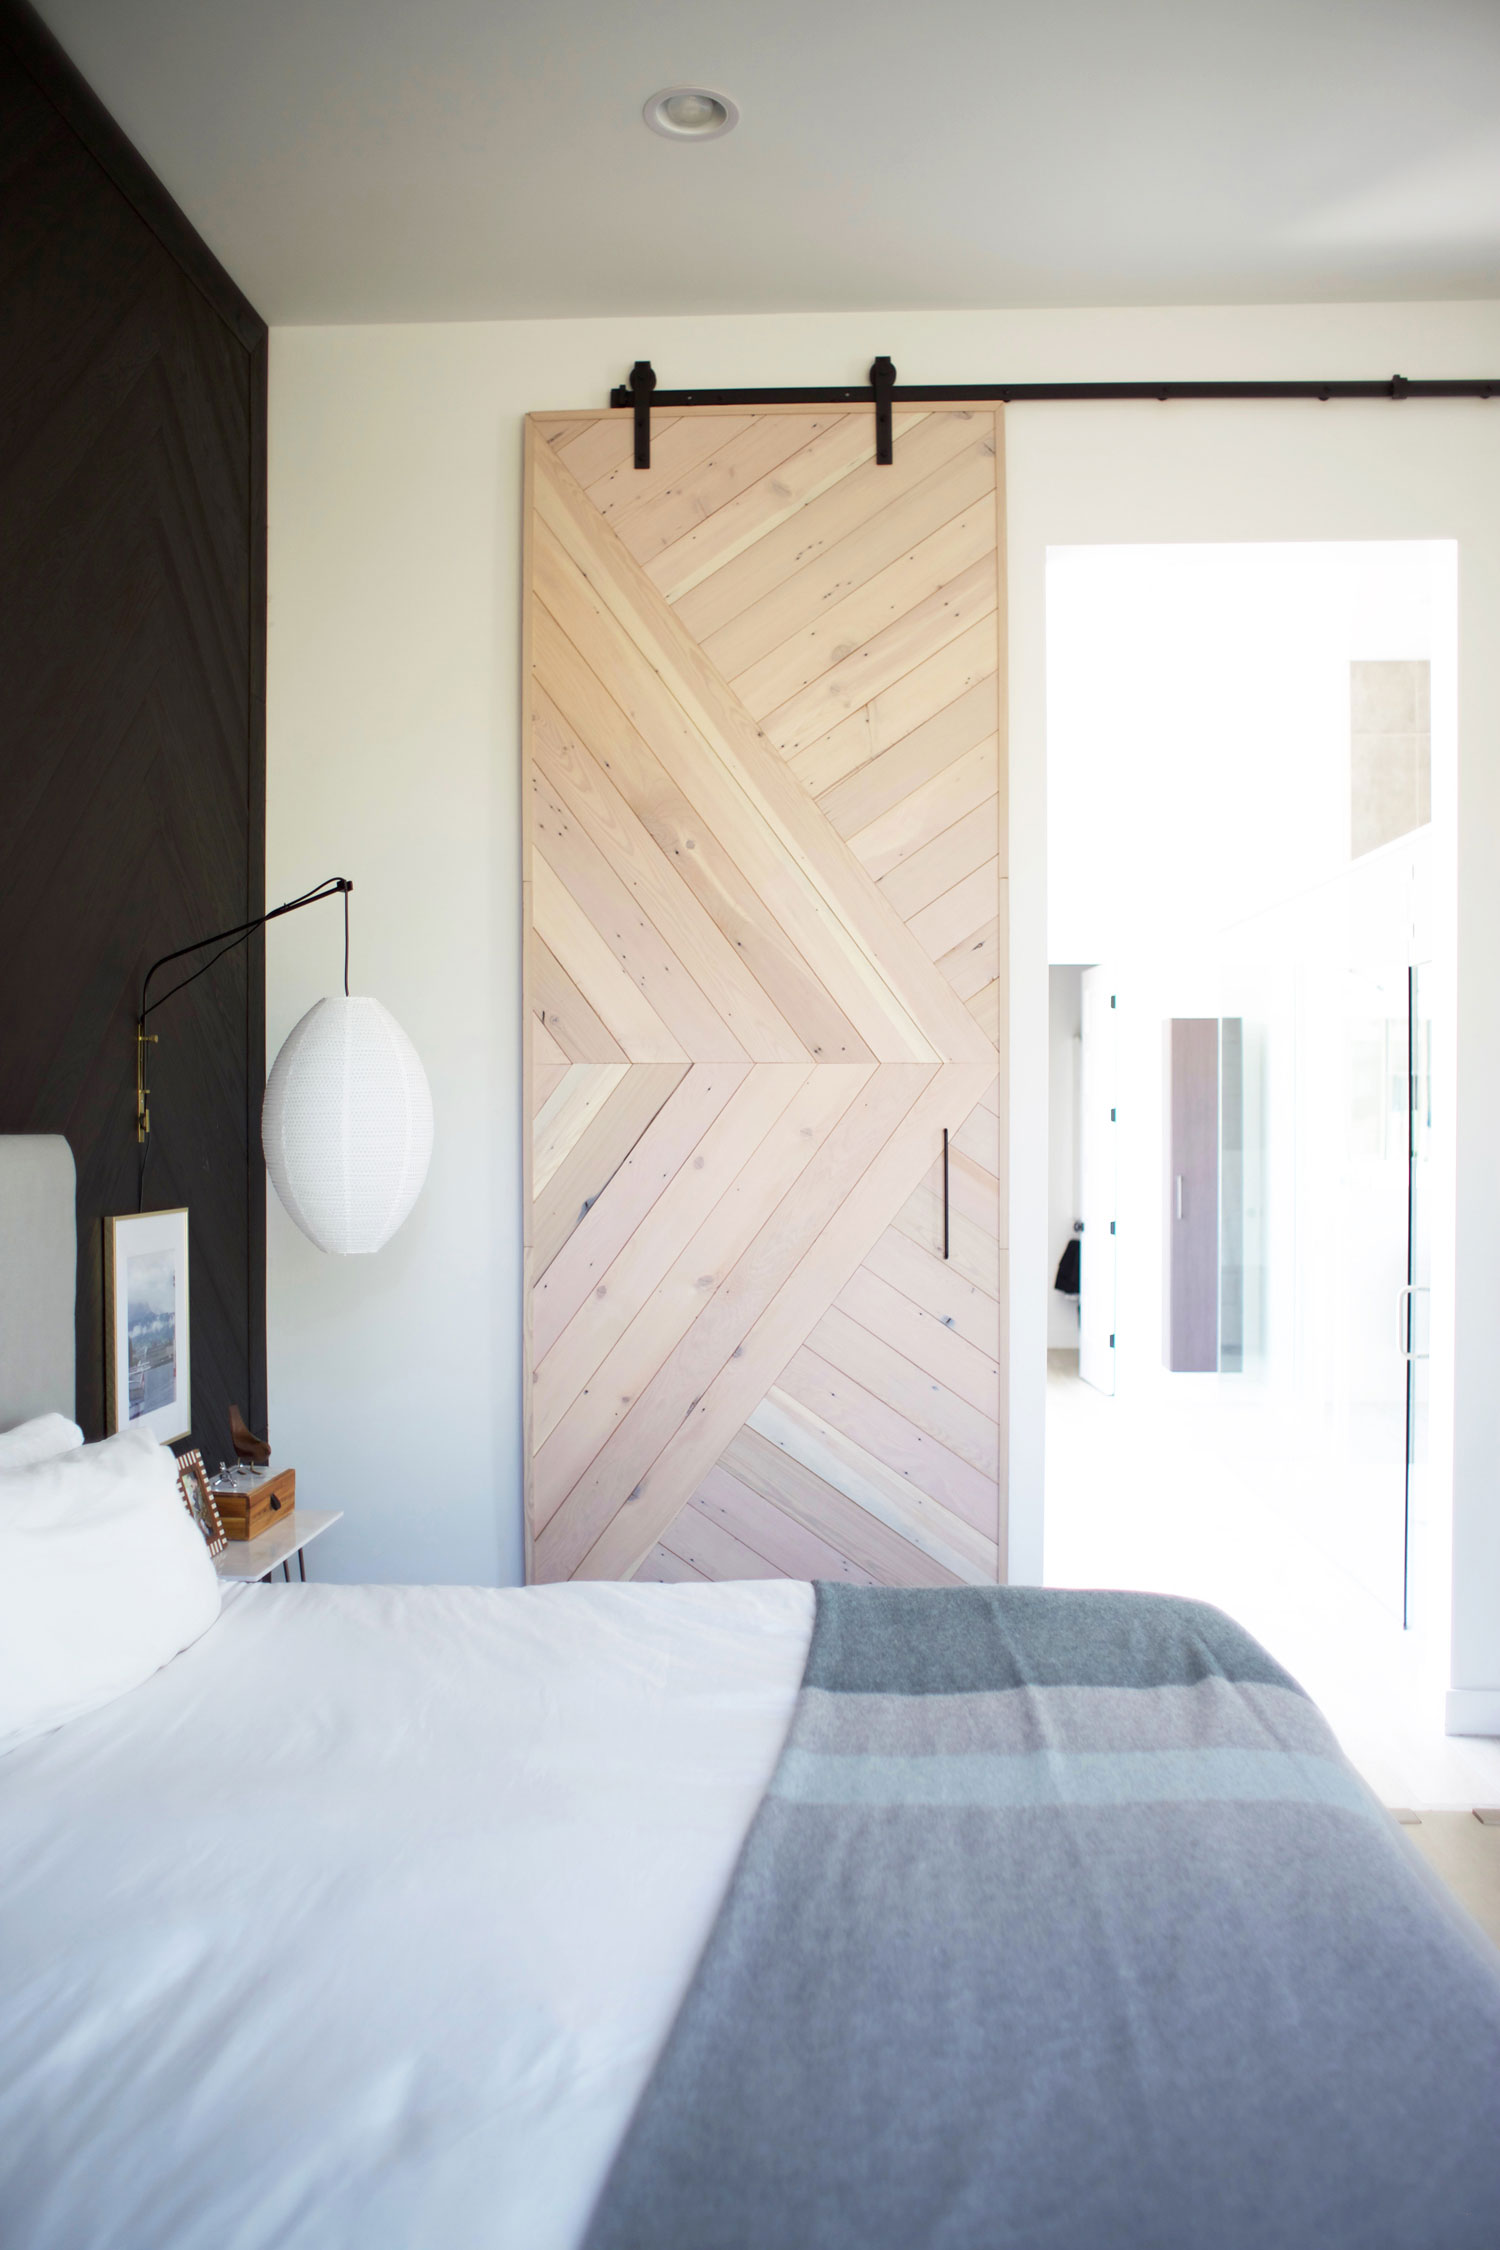
To figure out how much Stikwood you need, I recommend consulting with customer service. And my advice to you would be to way overestimate! I always end up having to order more wood. Pro tip: reuse as many boards as you can. Using the stikwood, lay out the pattern one half at a time. As you can see from the photo, the longest diagonal boards go from corner to corner. I would start with these planks.

Mark the cuts for each wood plank. Remember to measure twice, and I would error on making your marks slightly inside rather than outside the edge of the door. Ours seemed to be slightly larger than the edges of the door in parts. The corner trim will cover any inconsistencies. Then using whatever system you come up with, label each plank. This is so you can replace the pattern with ease. Using a miter saw that will make cuts at least 10" long, cut each plank where you marked.

Once each plank is cut, lay out the pattern again as exact as you can get it on all sides. Peel each plank and stick. Cut and add the corner trim pieces. If your door will not be seen on the opposite side (for example, if it is being used as a closet door), you can stop right here.

The back of our barn door is seen through the master bathroom, so we finished the opposite side just in the same manner as the front. The only exception is we used the stikwood black metal trim instead of the corner trim.

Add the hardware according to the barn door hardware kit instructions. Pro tip: if your wall studs do not line up with the holes on the bar, drill holes. It's very important that you secure the bar in the studs. You can get dummy bolts to cover the remaining holes. When measuring where you will put the bar, remember that the corner trim will add length to your door ... 6/16" of an inch to be exact. So you will need to put the bar slightly higher than the directions state.

Once the door is hanging, add the handle. Since our door will be used on the opposite side, we used the IKEA knobs on the opposite side. We screwed them into the long handle on the front using the fully threaded rod fasteners.
The standard barn door kits aren't very large, so if you have an extra big opening you want to cover, this DIY large barn door is your friend.

I love the feel of this DIY modern barn door. The wood is such a beautiful color. P.S. Here is a tutorial for the DIY swing arm wall lights you see here.

I made a lil video to go along with this post. I hope you like it! If so, please subscribe to my YouTube channel below.
If you find this post helpful, I would love it if you subscribe below! Subscribers get exclusive DIYs and a free party printable collection just for signing up!


